Ads

Avoiding Blank Subject Lines in Outlook 2000 - 2007


Have you ever received an email with a blank subject line?  
Have you ever clicked "Send" only to realize that you forgot to add a subject?  It’s frustrating to receive a message with no subject.

Happily there’s a simple solution to this issue.
Through the use of a few lines of VBA (Visual Basic for Applications) code we can have Outlook check the subject line of every item we send.

 Follow these instructions to use this solution.

Outlook 2000 - 2003.
1.      Start Outlook.
2.      Click Tools > Macro > Visual Basic Editor.
3.      If not already expanded, expand Microsoft Office Outlook Objects and click on ThisOutlookSession.
4.      Copy the code below and paste it into the right-hand pane of Outlook's VB Editor window.
5.      Edit the code as needed.  I included comment lines wherever something needs to or can change.
6.      Click the diskette icon on the toolbar to save the changes.
7.      Close the VB Editor.
8.      Click Tools > Macro > Security.
9.      Set the "Security Level" to Medium.
10.      Close Outlook
11.      Start Outlook
12.      Outlook will display a dialog-box warning that ThisOutlookSession contains macros and asking if you want to allow them to run.  
Click Yes.

Lets do the same for Outlook 2007
 
1.      Start Outlook.
2.      Click Tools > Macro > Visual Basic Editor.
3.      If not already expanded, expand Microsoft Office Outlook Objects and click on ThisOutlookSession.
4.      Copy the code below and paste it into the right-hand pane of Outlook's VB Editor window.
5.      Edit the code as needed.  I included comment lines wherever something needs to or can change.
6.      Click the diskette icon on the toolbar to save the changes.
7.      Close the VB Editor.
8.      Click Tools > Trust Center.
9.      Click Macro Security.
10.      Set "Macro Security" to Warnings for all macros.
11.      Click OK.
12.      Close Outlook
13.      Start Outlook.  Outlook will display a dialog-box warning that This Outlook Session contains macros and asking if you want to allow them to run.  Click Yes..

Private Sub Application_ItemSend(ByVal Item As Object, Cancel As Boolean)
    If Item.Subject = "" Then
        'Edit the message and the popup caption on the next line as desired.'
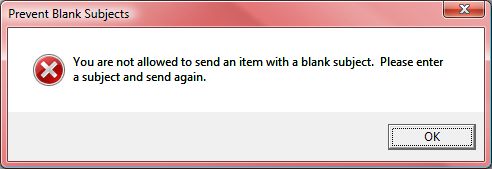
        msgbox "You are not allowed to send an item with a blank subject.  Please enter a subject and send again.", vbCritical + vbOKOnly, "Prevent Blank Subjects"
        Cancel = True
    End If
End Sub


Let's test this!!
Create a test message and leave the subject blank. 
Click Send. 
Outlook should cancel the send and display a pop-up message that looks something like this.


Similarly, if you Forget to Add an Attachment to your Outlook Email here is the code to NOT repeat it!!!

Private Sub Application_ItemSend(ByVal Item As Object, Cancel As Boolean)
    'On the next line edit the list of keywords as desired.  Be sure to separate each word with a | character.'
    Const KEYWORDS = "attached|attachment|attachments|enclosed|enclosure"
    'On the next line edit the message that will be displayed when the message should include an attachment as desired.'
    Const WARNING_MSG = "Wording in the message suggests that something is attached, but there are no items attached.  Do you want to cancel the send and add an attachment?"
    'On the next line edit the dialog-box title as desired.'
    Const MSG_TITLE = "Attachment Checker"
    Dim objRegEx As Object, colMatches As Object, bolAttachment As Boolean, olkAttachment As Outlook.Attachment
    Set objRegEx = CreateObject("VBscript.RegExp")
    With objRegEx
        .IgnoreCase = True
        .Pattern = KEYWORDS
        .Global = True
    End With
    Set colMatches = objRegEx.Execute(Item.Body)
    If colMatches.count > 0 Then
        For Each olkAttachment In Item.Attachments
            If olkAttachment.Type <> olEmbeddeditem Then
                bolAttachment = True
                Exit For
            End If
        Next
        If Not bolAttachment Then
            If msgbox(WARNING_MSG, vbQuestion + vbYesNo, MSG_TITLE) = vbYes Then
                Cancel = True
            End If
        End If
    End If
    Set olkAttachment = Nothing
    Set colMatches = Nothing
    Set objRegEx = Nothing
End Sub

Effective Googling - Search google effectively


In my earlier post, I had listed some ways to search entities using google search. In this post, I enlist below some ways in which you could search using Google, in an effective way;


1. Need Exact Phrase? Use quotation marks!
eg: “infosys billion dollar”

2. Expand Search With Synonym?  Use a “tilde”
e.g.: “~infosys” finds IT companies similar to Infosys

3. Search by filetype (pdf, ppt, xls, doc)
e.g.: “.Net Framework” filetype:ppt

4. Negative Search Terms
e.g.: “nano –car” will return the results with word ‘nano’ but not Tata Nano car.

Please use " " marks to search specific results.

5. Limit your search results to a particular web site
e.g.: “sparsh site:infosys.com” will get the pages from infosys.com where the word ‘sparsh’ is referred.

6. Search for sites that link to a particular website:
e.g.: “link:infosys.com”

7. You’ve found a useful website & want to find other sites like it:
e.g.: “related:www.infosys.com”

8. Google is a Dictionary
Find definition of a word or a phrase?
e.g.:  define: scruples

9. Google is a Calculator as well :)


10. Google is Converter too..!
eg: Convert currency, units and a lot more


11. More Search Operators

allinanchor:
allintext:
allintitle:
allinurl:
cache:
group:
info:
time
weather


12. Use Specialty Search Functions

Google Images:
images.google.com
Google Blog Search: blogsearch.google.com
Google Finance:  finance.google.com
 
a. Google News Alerts news.google.com
Tracking an event in the news?
Create your own Google News alert – it’s free!
Can choose to monitor latest developments on web pages, blogs, Google news, Google discussion group pages, or all of these sources.

b. Google Scholar  
scholar.google.com 
Covers: law, medicine, social sciences, arts, humanities, business, & finance.
Included items: peer-reviewed papers, theses, book excerpts, abstracts & full-text articles
Sources for items: academic publisher web pages, professional societies, preprint repositories, universities, & other scholarly organizations.

c. Google Book Search 
books.google.com
Searches full text of indexed books.
If work is in public domain, full contents usually available.
If not, users can view bibliographic info (author, title, publisher) and perhaps some excerpts.
Library partners:  UC, Princeton, Stanford, Univ. of Michigan, Univ. of Texas, Oxford, UVA, Univ. of Wisconsin, ……

13. Something exciting at last !!!

Localized search
local.google.co.in
Effective localized search solution 

14. Movie search
google.co.in/movies
Find theatres running your desired movies in your city..wow

15. Code search
google.com/codesearch
Ssearch public source code

16. Google hack for finding movies/music
(warning: Not to be tried at office but home…!)
e.g.: intitle:”index.of”(mp3|mp4|avi|dat|mpeg) mummy

More Interesting stuff !!
Try...
Google Docs
Google Calendar
Google Reader
Google Gear
Google App Engine
Google Sites
Google Sets
Google Trends and so on…

What else??

Let's see the concept of "PageRank"

PageRank explained by Google:
Google interprets a link on page A going to page B as a vote -- by page A, for page B. Google looks at more than the sheer volume of votes, or links a page receives; it also analyzes the page that casts the vote. Votes cast by pages that are themselves "important" weigh more heavily. 


FireFTP

FireFTP is a free, secure, cross-platform FTP client for Mozilla Firefox which provides easy and intuitive access to FTP servers.


Along with transferring your files quickly and efficiently, FireFTP also includes more advanced features such as: 

directory comparison, syncing directories while navigating, SFTP, SSL encryption, search/filtering, integrity checks, remote editing, drag & drop, file hashing, and much more!


Firefox recommends this add-on with: Firefox 3.5 - 3.6

Nokia Mobile Phone Unlock & Hidden Feature codes

These codes will work on most Nokia Mobile Phones to activate/deactivate advanced hidden functions that you can’t change through the phone menu

One useful function that all Nokia’s I’ve owned have is “Cell Info Display” which can usually be found in the phones “Display settings” (eg: in a Nokia 1600) or “Phone Settings” (eg: in a Nokia 3315)

If your network supports it, when “Cell Info Display” is enabled, it will display the name of the base station your mobile is currently connected to on the screen eg: when i’m walking around the city it says “Sydney CBD” and when i’m at home it displays the name of my suburb.

Note:
To display “p” press “*” three times within one second, To display “w” press “*” four times within one second, To display “+” press twice “*” within less than a second

Code Function

*3370# / #3370# Activate / Deactivate Enhanced Full Rate Codec (EFR) – Your phone uses the best sound quality but talk time is reduced my approx. 5%
*#4720# / *#4720# Activate / Deactivate Half Rate Codec – Your phone uses a lower quality sound but you should gain approx 30% more Talk Time
*#7220# / *#7230# Enable / Disable PCCCPH support (faster GPRS)

#pw+1234567890+1# Provider Lock Status. (use the “*” button to obtain the “p,w” and “+” symbols)
#pw+1234567890+2# Network Lock Status. (use the “*” button to obtain the “p,w” and “+” symbols)
#pw+1234567890+3# Country Lock Status. (use the “*” button to obtain the “p,w” and “+” symbols)
#pw+1234567890+4# SIM Card Lock Status. (use the “*” button to obtain the “p,w” and “+” symbols)
12345 This is the default security code

*#0000# Displays your phones software version,  
1st Line : Software Version,  
2nd Line : Software Release Date, 
3rd Line : Compression Type
*#9999# Phones software version if *#0000# does not work
*#06# For checking the International Mobile Equipment Identity (IMEI Number)

*#67705646# Removes operator logo on 3310 - 3330
*#73# Reset phone timers and game scores
*#746025625# Displays the SIM Clock status, if your phone supports this power saving feature “SIM Clock Stop Allowed”, it means you will get the best standby time possible press and hold # Lets you switch between lines

*#7760# Manufacturers code
*#7780# Restore factory settings
*#8110# Software version for the nokia 8110
*#92702689# Displays – 1.Serial Number, 2.Date Made, 3.Purchase Date, 

4.Date of last repair (0000 for no repairs), 

5.Transfer User Data. 
To exit this mode you need to switch your phone off then on again

How to Lock Individual Cells in a Excel Worksheet (MS Office)


What happens when you lock cells in Excel Worksheet?
If you lock a cell and protect the worksheet, then you cannot type data into the cell, modify the data currently in the cell, or change other attributes of the cell (such as cell formatting).

This article describes how to lock individual cells in a Microsoft Excel worksheet. The procedure to use depends on whether you want the majority of the cells on the worksheet to remain locked or unlocked.


If You Want the Majority of Cells Locked
To lock the majority of the cells on the worksheet, follow these steps:

   1. Select the cells that you want to remain unprotected. To select nonadjacent (noncontiguous) cells, hold down CTRL and click the cells that are to remain unprotected.
   2. On the Format menu, click Cells, and then click the Protection tab.
   3. Click to clear the Locked check box and click OK.
   4. On the Tools menu, point to Protection, and then click Protect Sheet. Type a password if you want one, and then click OK.


Recover locked password here !!

If You Want the Majority of Cells Unlocked
To leave the majority of the cells on the worksheet unlocked, follow these steps:

   1. Select the entire worksheet by clicking the Select All button (the gray rectangle in the upper-left corner of the worksheet where the row 1 and column A headings meet), or by pressing CTRL+A or CTRL+SHIFT+SPACEBAR.
   2. On the Format menu, click Cells, and then click the Protection tab. Click to clear the Locked check box and click OK.
   3. Select the cells that you want to protect. To select nonadjacent (noncontiguous) cells, hold down CTRL and click the cells that you want to protect.
   4. On the Format menu, click Cells, and then click the Protection tab. Click to select the Locked check box, and then click OK.
   5. On the Tools menu, point to Protection, and then click Protect Sheet. Type a password, if you want one, and then click OK.

Source

Configuring Outlook 2007 for IMAP Access to Gmail

Assuming you have IMAP enabled for your Gmail account, follow these steps to configure Outlook for IMAP access:

1. In the main Outlook menu, click Tools then Account Settings. This opens the Account Settings dialog box.

2. On the E-mail tabbed page, click New. This launches the Add New E-mail Account wizard.

3. On the Choose E-mail Service screen, select Microsoft Exchange, POP3, IMAP, and HTTP, then click Next. The Auto Account Setup screen appears.

4. On the Auto Account Setup screen, set the Manually configure server settings or additional server types checkbox, then click Next. A different Choose E-mail Service screen appears.

5. Select Internet E-mail, then click Next. The Add New E-mail Account screen appears.


  1. Enter your name and your full Gmail e-mail address, including the '@gmail.com.'
  2. For Account Type, select IMAP.
  3. In the Incoming mail server field, enter imap.gmail.com, and in the Outgoing mail server field, enter smtp.gmail.com.
  4. In the Logon Information section, enter your Gmail user name and password.
  5. Set the Remember password checkbox so Outlook can work with your Gmail account without requiring you to enter your logon information constantly.
  6. Click the More Settings button. This opens the Internet E-mail Settings dialog box.
  7. On the Advanced tabbed page, set the Incoming server (IMAP) to 993.


  1. For the Use the following type of encrypted connection, select SSL.
  2. Set the Outgoing server (SMTP) to 587.
  3. For the Use the following type of encrypted connection, select TLS.
  4. Click OK to close the Internet E-mail Settings dialog box.
  5. Click Next, then Finish, then Close to complete the process.
Once you complete all the steps successfully, Outlook connects to your Gmail account and downloads messages. You will find a new set of folders that corresponds to your Gmail account in the Navigation pane.

Configuring Outlook 2003 or XP for Gmail IMAP Access

If you are not using Outlook 2007, follow these steps to configure Outlook for IMAP access to your Gmail account:
  1. In the Outlook main menu, click Tools, then E-mail Accounts. This launches the E-mail Accounts wizard.
  2. Select Add a new e-mail account, then click Next.
  3. Select IMAP, then click Next.
  4. Enter your name and your full Gmail e-mail address, including the '@gmail.com.'
  5. For Account Type, select IMAP.
  6. In the Incoming mail server field, enter imap.gmail.com, and in the Outgoing mail server field, enter smtp.gmail.com.
  7. In the Logon Information section, enter your Gmail user name and password.
  8. Set the Remember password checkbox so Outlook can work with your Gmail account without requiring you to enter your logon information constantly.
  9. Click the More Settings button. This opens the Internet E-mail Settings dialog box.
  10. On the Advanced tabbed page, set the Incoming server (IMAP) to 993.
  11. For the Use the following type of encrypted connection, select SSL.
  12. Set the Outgoing server (SMTP) to 587.
  13. For the Use the following type of encrypted connection, select TLS.
  14. Click OK to close the Internet E-mail Settings dialog box.
  15. Click Next, then Finish, then Close to complete the process.
Once you complete all the steps successfully, Outlook connects to your Gmail account and downloads messages. You will find a new set of folders that corresponds to your Gmail account in the Navigation pane. 

Source


Configure Outlook for Gmail POP3 Access


I have faced lot of issues while configuring this one!
Let's see how to do this...


Ready to configure Outlook for Gmail POP3 access?

This page includes step-by-step instructions for creating a Gmail Outlook connection (Outlook 2003 > 2007) using the POP3 mail protocol.

One of the really nice things about Outlook 2007 is the way it can automatically configure email accounts at many of the major services. 
Gmail is one of those services.

Compare the instructions for automatically configuring a Gmail account in Outlook 2007 to those further down the page for earlier versions. Nine steps instead of 19. That's a major reduction in the work required to configure Outlook with Gmail.


Configuring Outlook 2007 for Gmail POP3 Access

If you are using Outlook 2007, follow these steps to configure Outlook for Gmail POP3 account use:

1. In the Outlook main menu, click Tools, then Account Settings. This opens the Account Settings dialog box.

2. Click New to launch the Add New E-mail Account wizard.

3. On the Choose E-mail Service screen, select Microsoft Exchange, POP3, IMAP, or HTTP, then click Next.


Enter your Gmail account information here for Outlook 2007.

4. On the Auto Account Setup screen, enter your name (as you want it to appear in the From field of messages) into the Your Name field.

5. Enter your full Gmail email address, which is your username followed by "@gmail.com", in the E-mail Address field.

6. Enter your Gmail password in the Password field.

7. Enter your Gmail password again in the Retype Password field, then click Next.

8. Outlook connects to the Gmail servers, and assuming you entered your account information correctly, after a moment it displays the Congratulations! screen.

9. Click Finish. Your Gmail account is configured.

That's the last step in the procedure to configure Outlook for Gmail. Now you can use the CTRL-1 keyboard shortcut to go to the Mail view.

Next press F9 to send and receive all mail. This downloads messages from Gmail. Seeing them in the Inbox will show that you were able to successfully configure Gmail as an Outlook email account.


Configuring Outlook 2003 or XP for Gmail POP3 Access

If you are not using Outlook 2007, follow these steps to configure Gmail and Outlook account use:

1. In the Outlook main menu, click Tools, then E-mail Accounts. This launches the E-mail Accounts wizard.

2. Select Add a new e-mail account, then click Next.

3. Select POP3, then click Next.


Enter your Gmail account information here for Outlook 2003.

4. Enter your name (as you want it to appear in the From field of messages) into the Your Name field.

5. Enter your full Gmail email address, which is your username followed by "@gmail.com", in the E-mail Address field.

6. Enter your Gmail username in the User Name field.

7. Enter your Gmail password in the Password field.

8. Enter "pop.gmail.com" in the Incoming mail server (POP3) field.

9. Enter "smtp.gmail.com" in the Outgoing mail server (SMTP) field.

10. Click More Settings to open the Internet E-mail Settings dialog box.

11. Click the Outgoing Server tab.

12. Set the My outgoing server requires authentication check box.

13. Select Use same settings as my incoming mail server.

14. Click the Advanced tab.

15. Under Incoming server (POP3), set the This server requires an encrypted connection (SSL) check box.

16. Under Outgoing server (SMTP), set the This server requires an encrypted connection (SSL) check box.

17. Change the number in the Outgoing server (SMTP) field to 465, then click OK.

18. Click Test Account Settings. After a moment you should see a message that says all tests were completed successfully. If not, go back to the start of this procedure and check your work.

19. Once you see the success message, click Next then Finish.

That's the last step in the procedure to configure Outlook for Gmail. Now you can use the CTRL-1 keyboard shortcut to go to the Mail view.

Next press F9 to send and receive all mail. This downloads messages from Gmail. Seeing them in the Inbox will show that you were able to successfully configure Gmail as an Outlook email account.


and also check out


How to add and display a second time zone in Outlook


You can add and display a second time zone in Outlook, which can be useful when you are scheduling meetings or conference calls with people who are working in other time zones. 
When you add a second time zone, the current time in the primary time zone is highlighted with a color gradient to make it easier to see.


If two time zones are shown, the meeting organizer's time zone is used as the reference point. If you organize a meeting and display free/busy time for invitees from other time zones, their busy times are adjusted so that they are displayed correctly in your time zone. 
The second time zone is visible only when you view the calendar in day or week view.

The start and end times for items in the Outlook Calendar are stored in the Coordinated Universal Time (UTC) format. UTC is the international time standard. It is similar to Greenwich Mean Time (GMT), except that UTC observes no daylight saving time (DST) and is based on a 24-hour clock. Zero (0) hours UTC is midnight GMT. The local 24-hour time convention is converted to UTC by adding or subtracting hours based on location in relation to the prime meridian, as well as local daylight saving time considerations.

If you are in one time zone, and you send a meeting request to an attendee in a different time zone, the meeting item is displayed at the respective local times on each person's calendar, but stored as the same absolute time in UTC.

For example, if a meeting organizer in the Pacific Time zone in the United States sends out a meeting request for a meeting that starts at 2:00 P.M. Pacific Time to an attendee in the Mountain Time zone, the attendee will see the meeting as starting at 3:00 P.M. Mountain Time. In both cases, the meeting is stored on the servers as starting at the same UTC time (10:00 P.M.).

Note: With respect to time zones, appointments, meeting items, and all-day events are all handled in the same way.


Add a second time zone

Outlook can display two separate time zones in the Calendar. The two time zones can be, for example, your local time zone and the time zone of a city that you often travel to. When you are staying in the other city, you might want to view your Calendar items in relation to the time zone for that city. To display a second time zone in your Outlook calendar, select the Show an additional time zone check box in the Time Zone dialog box. The second time zone is used only to show a second time bar in Calendar view, and does not affect the way in which Calendar items are stored or displayed.

1. On the Tools menu, click Options.
2. Click Calendar Options.
3. Click Time Zone.
4. Select the Show an additional time zone check box.
5. In the Label box, type a name for the additional time zone.
6. In the Time zone list, click the time zone that you want to add.
7. If you want your computer clock to automatically adjust for daylight saving time changes, select the Adjust for daylight saving time check box.

This option is available only in time zones that use daylight saving time (DST).

Tip: You can quickly switch from your current time zone to the other time zone by clicking Swap Time Zones. This change affects all time displays in Outlook and in all other Microsoft Windows-based programs.


Remove a time zone

1. On the Tools menu, click Options.
2. Click Calendar Options.
3. Click Time Zone.
4. Clear the Show an additional time zone check box.


Install Windows 7 / Vista From USB Drive [Detailed 100% Working Guide]

This guide works 100% for Vista & Windows 7 unlike most of the guides out there. I have seen many sites/blogs that have “Install Vista from USB guide” but either with incomplete steps or not working guide. I have also seen some guides that don’t’ use proper commands in this guide. After spending many hours I have come up with this 100% working guide.


I just did this method on one of my friends machine and installed the new Windows 7 BETA. The main advantage is that by using USB drive you will be able to install Windows 7/Vista in just 15 minutes. You can also use this bootable USB drive on friend’s computer who doesn’t have a DVD optical drive.


The method is very simple and you can use without any hassles. Needless to say that your motherboard should support USB Boot feature to make use of the bootable USB drive.


Requirements:


*USB Flash Drive (Minimum 4GB)


*Windows 7 or Vista installation files.


Follow the below steps to create bootable Windows 7/Vista USB drive using which you can install Windows 7/Vista easily.


1. Plug-in your USB flash drive to USB port and move all the contents from USB drive to a safe location on your system.


2. Open Command Prompt with admin rights. Use any of the below methods to open Command Prompt with admin rights.


*Type cmd in Start menu search box and hit Ctrl+ Shift+ Enter.


Or


*Go to Start menu > All programs > Accessories, right click on Command Prompt and select Run as administrator.


3. You need to know about the USB drive a little bit. Type in the following commands in the command prompt:


First type DISKPART and hit enter to see the below message.


Next type LIST DISK command and note down the Disk number (ex: Disk 1) of your USB flash drive. In the below screenshot my Flash Drive Disk no is Disk 1.


4. Next type all the below commands one by one. Here I assume that your disk drive no is “Disk 1”.If you have Disk 2 as your USB flash drive then use Disk 2.Refer the above step to confirm it.


So below are the commands you need to type and execute one by one:


SELECT DISK 1


CLEAN


CREATE PARTITION PRIMARY


SELECT PARTITION 1


ACTIVE


FORMAT FS=NTFS


(Format process may take few seconds)


ASSIGN


EXIT


Don’t close the command prompt as we need to execute one more command at the next step. Just minimize it.


5. Next insert your Windows7/Vista DVD into the optical drive and check the drive letter of the DVD drive. In this guide I will assume that your DVD drive letter is “D” and USB drive letter is “H” (open my computer to know about it).


6. Maximize the minimized Command Prompt in the 4th step.Type the following command now:


D: CD BOOT and hit enter.Where “D” is your DVD drive letter.


CD BOOT and hit enter to see the below message.


7. Type another command given below to update the USB drive with BOOTMGR compatible code.


BOOTSECT.EXE /NT60 H:


Where “H” is your USB drive letter. Once you enter the above command you will see the below message.


8. Copy your Windows 7/Vista DVD contents to the USB flash drive.


9. Your USB drive is ready to boot and install Windows 7/Vista. Only thing you need to change the boot priority at the BIOS to USB from the HDD or CD ROM drive. I won’t explain it as it’s just the matter the changing the boot priority or enabling the USB boot option in the BIOS.


Note: If you are not able to boot after following this guide means you haven’t set the BIOS priority to USB. If you got any problem in following this guide feel free to ask questions by leaving comment.


Also if you find this guide difficult to follow, please use the easy-to-use guide to create a bootable USB to install Windows 7 using official tool.

Source

How to use Aero Flip 3D and Alt-Tab in Windows 7


Aero Flip 3D was first introduced in Vista. 

With Aero Flip 3D, you can quickly preview all of your open windows 
(for example, open files, folders, documents and programs) without accessing the taskbar. It displays your open windows in a visually pleasing stack.


To use Flip 3D, click and hold the Windows button together with the Tab key. 
As you hold the windows button press the tab key to rotate the stack. This will move the windows in a queue so you can see all of your windows in sequence. Once you see the window that you want to view, release the windows button. The window when you release the windows button will be the active window.

Alt-Tab on the other hand will show the opened windows too, but in a different visual presentation. Instead of a 3D stack, it displays the each of the windows’ thumbnails. On Windows XP, Alt-Tab displays the icons of the programs instead of thumbnails. You can switch between windows by continually pressing Tab while holding Alt.


You can also move around by using the arrow keys instead of the Tab key.

Note: Flip 3D is part of the Aero experience. If your computer does not support Aero, or if you are using a theme other than a Windows 7 Aero theme, you can view the open programs and windows on your computer by pressing Alt+Tab.

If you find the traditional Alt-Tab method to be boring, the Flip 3D method is a good alternative. The only downside is that you need to have a hardware that supports Aero.


How to change the Default OS Boot Order between Windows 7 and Vista?


If you have recently installed Windows 7 beta on your Vista machine like me, then you may be wondering what is the easy way to change the boot order between Windows 7 and Vista without manually changing any settings under boot.ini or any other file.


Here is a way to change the default OS to boot using the Advanced System Properties under Vista.

So how to change the default OS to boot from Windows 7 to Vista?

Go to 
Control Panel Home (Start -> Control Panel) -> System and Maintenance -> System.

On the left side pane, under the Tasks, Click Advanced System Settings.

Click Settings under Startup and Recovery.


Under System startup, you can change the Default operating system between Windows 7 and Vista. If you have installed any other OS, you can change between those settings as well.


Click OK and the next time you start your computer, the boot order should have changed. You can also change the time duration for which it shows to change the booting OS.


PLEASE NOTE:
If you want to change the boot sequence on your MAC NoteBook !
In System Preferences > Startup Disk you should be able to choose Mac OS X as the default system in which you wish to boot.